
Cookie cutter recipe: 5 irresistible cookie recipes
Cookie cutter recipe: 5 irresistible cookie recipes
A cozy afternoon with the family, the smell of freshly baked cookies in the air - who can resist that? Cookies are not only delicious, but also fun for young and old. In this article we present five irresistible recipes that you should definitely try!
Why do we love cookies so much? Is it the variety of shapes, the ability to decorate them individually or just the irresistible taste? Probably a combination of all of these reasons!
Why prefer personalized cookie cutters?
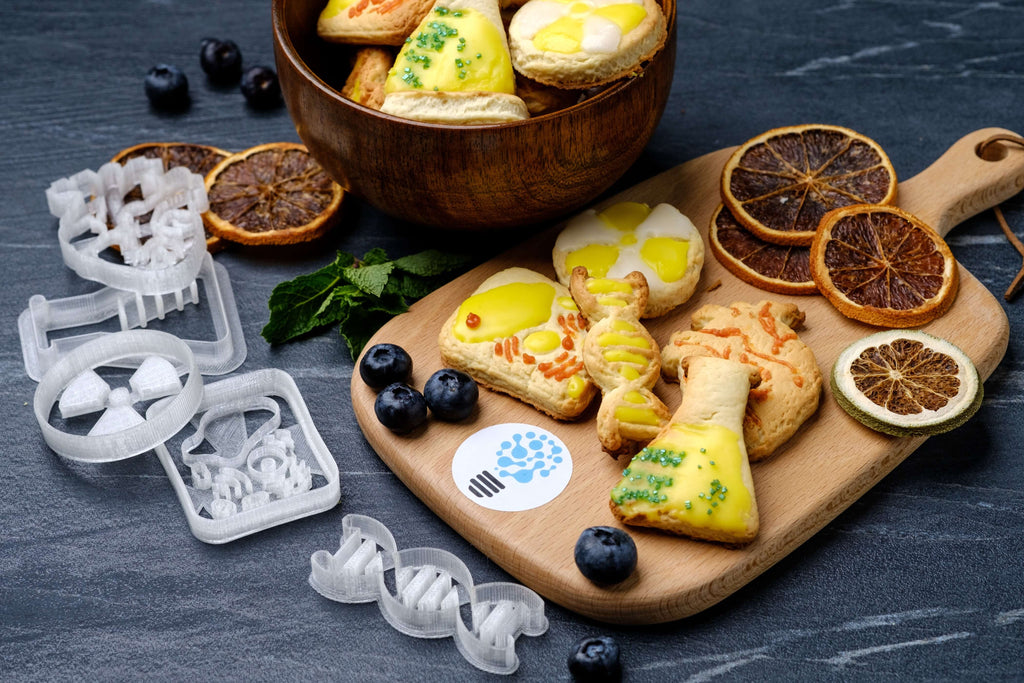
A great innovation and highlight when baking are personalized cookie cutters. With these unique cookie cutters you can not only conjure up creative and individual shapes, but also make a contribution to sustainability.

Our personalized cookie cutters are not only functional, but also eco-friendly - a must for any eco-conscious baker!
Baking with personalized cookie cutters is a special experience. It combines the joy of baking with creating your own design. So, why not use the personalized cutters next time you bake and do something good for the environment at the same time?
1. Chocolate chip cookies

Delicious chocolate chip cookies with scientific motifs from DNA to Pi, made with the laboratory cookie cutter set.
Preparation time: 20 min
Baking time: 15 minutes
Quantity: 30 cookies
Ingredients:
- 115g butter
- 170g brown sugar
- 2 large eggs
- 1 teaspoon pure vanilla extract
- 340g dark chocolate pieces
- 300g flour
- ¾ teaspoon baking powder
- 1 teaspoon fine salt
Preparation:
-
Preparing the oven: Preheat the oven to 190°C and line two baking sheets with parchment or silicone paper. Place these in the middle of the oven.
-
Preparation of the liquid ingredients: Place butter in a microwave-safe bowl and melt on medium power. After cooling briefly, whisk together the sugar, eggs, melted butter and vanilla in a large bowl until smooth.
-
Mix the dry ingredients: In a separate bowl, mix together the flour, baking powder and salt. Then carefully fold the dry ingredients into the liquid mixture with a wooden spoon. Finally, fold in the chocolate chips or pieces.
-
Cookie shapes: Use a tablespoon to place dough portions on the prepared baking sheets. Lightly moisten your hands and roll out the dough to a thickness of approx. 0.5 cm. Cut out the desired shape with a cookie cutter and place the cookies on the baking tray, approx. 5 cm apart.
-
Baking the cookies: Bake for 12 to 16 minutes, depending on your preference, until the cookies are golden brown and still slightly soft in the middle. Carefully place the finished cookies on a wire rack using a spatula and allow to cool.
Follow the steps above for perfect chocolate chip cookies. Let the cut out cookies cool and enjoy with a coffee or cocoa!
2. Glazed cookies

Colorful glazed cookies in a pharmaceutical design. From plaster cookies to colorful tablet cookies made with the pharmacy cookie cutter set.
Preparation time: 3 0 min
Baking time: 10-30 minutes
Quantity: 24 cookies
Ingredients:
- 100g butter
- 100g powdered sugar
- 1 medium free-range egg
- 1 teaspoon vanilla extract
- 275g flour
For decoration:
- 200g powdered sugar
- 3-4 tsp water
- 2-3 drops of food coloring
Preparation:
-
Sift ingredients: Sift flour, baking powder and salt into a bowl and set aside.
-
Butter and sugar mixture: In a large bowl, cream together the butter and sugar until light. Then add the egg and vanilla extract.
-
Prepare the dough: Add the flour to the butter mixture and mix until a dough forms. Wrap it in cling film and chill for at least an hour.
-
Preheat the oven: Preheat the oven to 170°C. Roll out the dough on a lightly floured surface to a thickness of about 0.5 cm.
-
Form cookies: Roll out the dough using a rolling pin to a thickness of approx. 0.5 cm and create shapes using creative cookie cutters. Roll out the remaining dough again and repeat the steps.
-
Bake: Bake the cookies for 8-12 minutes or until golden brown.
-
Cool & Serve: Remove the cookies from the oven and place them on a cooling rack. Allow to cool completely before decorating.
-
Decorate: Mix water, powdered sugar and food coloring in a bowl and pour into a piping bag.
Give yourself a little more time when decorating to create a particularly attractive cookie; after all, the eye eats too!
3. Coconut cookies

Exotic coconut cookies in the shape of medical motifs. Skull cookies and heart cookies made with the medicine cookie cutter set.
Preparation time: 15 min
Baking time: 15 minutes
Quantity: 10 cookies
Ingredients:
- 120g flour
- 100 g desiccated coconut
- 225g sugar
- 1 egg
- 115g butter
Preparation:
-
Heat the oven: Preheat the oven to 180°C and line a baking tray with baking paper.
-
Mix dry ingredients: In a large bowl, mix together the flour, coconut flakes and sugar.
-
Add liquid ingredients: In a separate bowl, lightly beat the egg. Add the melted butter and stir well. Add this mixture to the dry ingredients and mix well until a uniform dough forms.
-
Cut out cookies: Use your hands or a spoon to take small portions of the dough and shape them into balls. Place these balls on the prepared baking tray and roll them out using a rolling pin to a thickness of approx. 0.5 cm. Use the cookie cutters to cut out the desired motifs and place them on the baking tray.
-
Baking the Cookies: Bake the cookies in the preheated oven for about 10-12 minutes or until golden brown. Be careful not to let them get too dark, otherwise they could become too hard.
-
Allow to cool: After baking, let the cookies cool briefly on the tray and then place them on a wire rack so that they can cool completely.
4. Raspberry Chocolate Chip Cookies

Fruity chocolate cookies in brain, eye and heart motifs. These anatomically correct cookies were made using the Anatomy Cookie Cutter Set.
Preparation time: 25 min
Baking time: 10 minutes
Quantity: 36 cookies
Ingredients:
- 225g butter
- 115g brown sugar
- 2 eggs
- 1 tsp vanilla
- 600g flour
- 1 teaspoon Baking powder
- 170g dark chocolate chips
- 140g fresh raspberries
Preparation:
-
Foamy mixture: Heat the butter and let it melt. Then stir with sugar in a bowl until fluffy. Add eggs and vanilla and mix well.
-
Dry ingredients: Add flour and baking powder to fluffy mixture and stir thoroughly.
-
Chocolate chips & raspberries: Stir the chocolate chips into the dough. Then wash the raspberries well and carefully fold them into the dough mixture.
-
Portioning: Place the finished biscuit mixture in round teaspoon portions on the tray and roll out to a thickness of approx. 0.5 cm.
-
Shaping: Cut out the favorite shapes with the cookie cutters and place them on the baking tray.
-
Baking: Bake at approx. 175°C for about 10 minutes.
These delicious chocolate raspberry cookies are a treat for berry lovers. Due to the strong taste of the cookies, plant-based milk drinks such as almond milk are a great combination.
5. Easy cookies

Simple butter cookies in Erlenmeyer flasks or DNA motifs. These scientific designs add a little something extra to even simple cookies!
Preparation time: 15 min
Baking time: 12 minutes
Quantity: 20 cookies
Ingredients:
- 90g butter
- 100g sugar
- 1 egg
- ½ tsp vanilla extract
- 200g plain white flour
- ½ tsp baking powder
- ½ tsp salt
Preparation:
-
Sift ingredients: Sift flour, baking powder and salt into a bowl and set aside.
-
Butter and sugar mixture: In a large bowl, cream together the butter and sugar until light. Then add the egg and vanilla extract.
-
Prepare the dough: Add the flour to the butter mixture and mix until a dough forms. Wrap it in cling film and chill for at least an hour.
-
Preheat the oven: Preheat the oven to 170°C.
-
Form the cookies: Roll out the cookie dough to a thickness of approx. 0.5 cm and shape it with a cookie cutter of your choice.
-
Bake: Bake the cookies for 8-12 minutes until golden brown.
-
Cool: Remove the cookies from the oven and place them on a cooling rack.
Follow the steps above to bake simple but delicious cookies. The best way to enjoy the shortbread cookies is with a good tea or coffee.
Final word
Whether you're an experienced baker or a beginner, these cookie recipes are easy to follow and guarantee delicious results. Try them out and enjoy the joy of baking!
FAQs
1. Where do I get personalized cookie cutters?
You can get cookie cutters based on your desired motif directly from us. You can find out everything about our service on our individual cookie cutter page.
2. Do you also have ready-made cookie cutters in the shop?
Yes, it's best to take a closer look at our shop category of cookie cutters . From cookie cutters in scientific designs, Easter cookie cutters or marine motifs, we have a great selection of cookie cutters available.
3. Can I make the recipes vegan?
Yes, you can use egg replacer and vegan butter.
4. How long do the cookies last?
Typically about a week if stored in an airtight container.
5. Can I use other fruits instead of raspberries?
Yes, you can use berries of your choice.
6. How can I decorate the cookies?
Use icing, sprinkles or chocolate chips. You can find more ideas for decorated cookies on our blog.
7. Can I use whole wheat flour instead of white flour?
Yes, but this may change the texture of the cookies.
